We all know that a well-functioning roof is important. And when you’ve just installed new asphalt shingles, you expect that your roof will be at its most reliable. So, when those brand-new shingles start misbehaving, it’s not just a cosmetic concern; it’s a red flag for potential trouble ahead.
If you’ve been Googling “new roof shingles not laying flat” You’ve come to the right place.
In this blog post, we’re delving into the intricate world of fixing roofing installation errors, from:
- Spotting the telltale signs
- Understanding the underlying causes
- Why you need a reliable contractor
Spotting Shingles That Aren’t Laying Flat
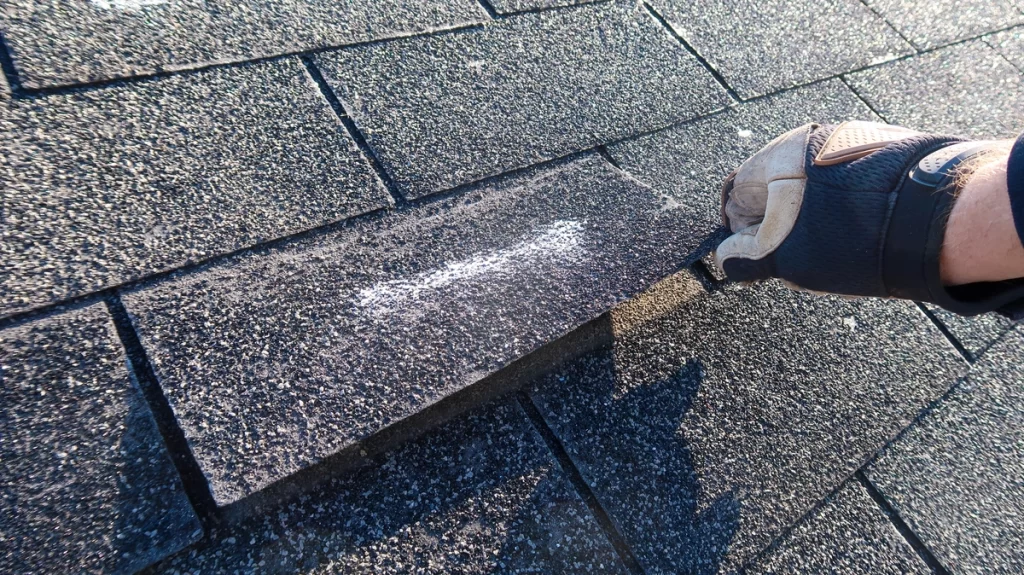
The first step in addressing the issue of non-compliant shingles is to identify them. Here are some key indicators to watch out for:
- Curling Edges: Take a stroll around your home and inspect the edges of your shingles. If you notice any curling or lifting, it’s a clear sign that they’re not laying flat as they should.
- Buckling: Buckled shingles create uneven surfaces on your roof, indicating a problem with installation or underlying structural issues.
- Missing Tabs: Shingles with missing tabs disrupt the uniformity of your roof and compromise its integrity.
- Uneven Appearance: Stand back and assess the overall appearance of your roof. If it looks uneven or bumpy, chances are some shingles aren’t laying flat.
Reasons Why Your New Shingles Aren’t Laying Flat
Now that you’ve identified the symptoms, let’s explore the root causes behind this vexing problem:
Poor Installation:
In many cases, shingles fail to lay flat due to improper installation. Factors such as incorrect nail placement, insufficient adhesive, or inadequate ventilation can all contribute to this issue.
Quality of Materials:
Substandard shingles or underlayment can lead to premature curling, buckling, or warping, resulting in an uneven roof surface.
Environmental Factors:
Extreme weather conditions, such as high winds, hailstorms, or prolonged exposure to UV radiation, can accelerate shingle deterioration and cause them to lose their flatness.
Structural Issues:
Underlying structural problems, such as sagging roof decks or inadequate support, can prevent shingles from laying flat and compromise the stability of your roof.
Why It’s Dangerous
Ignoring the problem of non-compliant shingles can have serious repercussions:
- Compromised Waterproofing: Shingles that don’t lay flat create gaps and vulnerabilities that allow water infiltration, leading to leaks and water damage inside your home.
- Reduced Energy Efficiency: An uneven roof surface can disrupt the airflow in your attic, compromising insulation and increasing energy bills.
- Risk of Mold and Rot: Moisture seeping through compromised shingles can promote the growth of mold and rot, posing health hazards and requiring costly remediation.
- Structural Damage: Over time, water damage and structural instability can weaken the entire roofing system, jeopardizing the safety of your home and its occupants.
10 Steps to Take When You Spot Your Shingles Not Laying Flat
If you are noticing that your shingles aren’t looking right, follow these steps to keep your roof safe.
1) Document the Issue:
As soon as you notice shingles that aren’t laying flat, document the problem by taking photographs from various angles. These visual records will be valuable for assessing the extent of the damage and communicating with contractors or insurance providers.
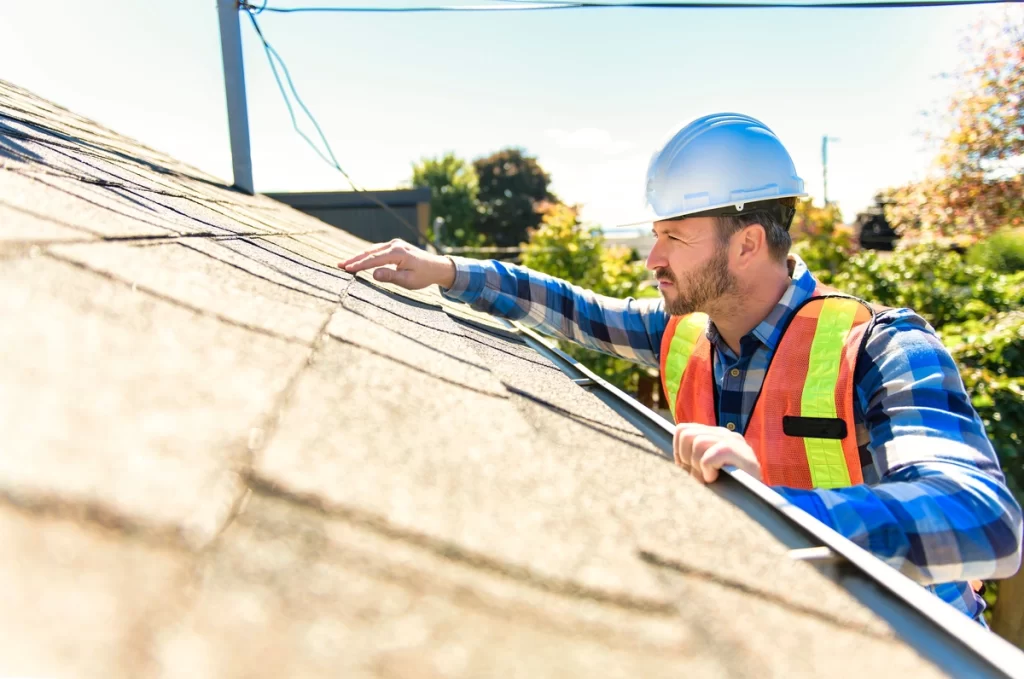
2) Contact a Professional Roofer:
While it may be tempting to attempt DIY repairs, addressing roofing issues requires specialized knowledge and equipment. Contact a reputable roofing contractor with experience in diagnosing and repairing shingle problems. They will conduct a thorough inspection to determine the underlying cause and recommend the appropriate course of action.
3) Schedule an Inspection:
Arrange for a professional inspection of your roof to assess the extent of the damage and identify any underlying issues that may be contributing to the problem. During the inspection, the roofer will examine the condition of the shingles, underlayment, flashing, and roof decking to pinpoint the root cause of the problem.
4) Obtain Multiple Quotes:
Don’t settle for the first contractor you contact. Instead, obtain multiple quotes from different roofing companies to compare prices, services, and warranties. Look for contractors who offer detailed estimates outlining the scope of work, materials to be used, and projected timeline for completion.
5) Evaluate Repair Options:
Based on the findings of the inspection and the recommendations of the roofing professionals, evaluate your repair options. Depending on the severity of the damage and the underlying cause, repairs may range from simple shingle replacements to more extensive work such as reinstallation of the entire roof.
6) Review Warranty Coverage:
If your roof is still under warranty, review the terms and conditions to determine if the repairs are covered. Keep in mind that warranties may have specific requirements and limitations, so it’s essential to understand what is and isn’t covered before proceeding with repairs.
7) Schedule Repairs Promptly:
Once you’ve selected a contractor and agreed on the repair plan, schedule the repairs promptly to prevent further damage to your roof and home. Delaying repairs can exacerbate the problem and lead to more extensive and costly repairs down the line.
8) Monitor the Repairs:
Throughout the repair process, stay in communication with the roofing contractor and monitor their progress closely. Inspect the workmanship to ensure that the repairs are being carried out to a high standard and that all issues are addressed satisfactorily.
9) Maintain Regular Roof Maintenance:
After the repairs are completed, commit to regular roof maintenance to prolong the lifespan of your shingles and prevent future problems. Schedule annual inspections and maintenance checks to identify any issues early on and address them before they escalate.
10) Keep Records:
Finally, keep detailed records of all repairs, inspections, and maintenance activities related to your roof. These records will be invaluable for future reference, warranty claims, and potential resale of your home.
Will Your Warranty Cover Repairs?
Whether your warranty covers repairs for non-compliant shingles depends on several factors:
- Warranty Terms: Review the terms and conditions of your warranty to determine if issues related to installation or material defects are covered.
- Manufacturer’s Warranty: Some manufacturers offer warranties specifically for their products, providing coverage for defects or premature failures.
- Installation Warranty: If your roof was installed by a reputable contractor, they may offer a separate warranty covering installation errors or workmanship issues.
- Transferability: Keep in mind that warranty coverage may be voided if the roof was installed incorrectly or if you fail to adhere to maintenance guidelines.
The Cost to Reinstall Shingles
Repairing or reinstalling non-compliant shingles can be a costly endeavor:
- Labor Costs: The labor-intensive process of removing and replacing shingles, along with any necessary repairs to the underlying structure, can drive up the cost significantly.
- Material Costs: Depending on the extent of the damage and the type of shingles used, you may need to invest in new materials to ensure a proper repair.
- Additional Expenses: Don’t forget to factor in ancillary costs such as disposal fees for old shingles, permits, and any unforeseen complications that may arise during the repair process.
Why It’s Always Important to Research a Contractor Before Hiring Them
Choosing the right contractor is paramount to ensuring the longevity and performance of your roof:
- Reputation: Look for contractors with a proven track record of quality workmanship and customer satisfaction. Check online reviews, ask for referrals, and research their credentials and certifications.
- Experience: A contractor with years of experience and expertise in installing and repairing roofs is more likely to deliver superior results and minimize the risk of installation errors.
- Licensing and Insurance: Verify that the contractor is properly licensed, insured, and bonded to protect yourself against liability and ensure compliance with local regulations.
- Warranty and Guarantees: Choose a contractor who stands behind their work with comprehensive warranties and guarantees, providing you with peace of mind and assurance that your investment is protected.
Let Us Install Your Shingle Properly
Your roof is one of the most important components of your home, and ensuring its structural integrity should be a top priority. By understanding the signs, causes, and consequences of non-compliant shingles, you can take proactive steps to address this issue and safeguard your home against potential damage. Remember to research contractors thoroughly, prioritize quality materials and installation, and address any issues promptly to maintain a safe, secure, and flat roof over your head.
If you want your roofing shingles installed correctly the first time, you want Monarch Roofing. Contact us today to get started!


