Roof sheathing is a critical component in the construction of a durable, weather-resistant roof. The thickness of the sheathing plays a significant role in the overall integrity of the roofing system, affecting everything from structural stability to energy efficiency. In this comprehensive guide, we will cover:
- Understanding roof sheathing
- Options for roof sheathing thickness
- Standards and building codes
- Installation tips for roof sheathing
🤔 Understanding Roof Sheathing
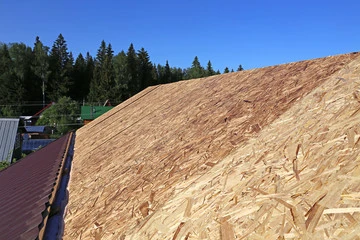
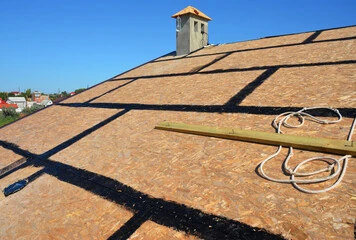
Roof sheathing, also known as decking, is the layer of material installed directly onto the roof rafters or trusses, providing a base for the roofing materials such as shingles or tiles. It serves several vital functions, including:
- Structural Support: Sheathing distributes the weight of the roof coverings and any external loads, such as snow or wind, across the rafters or trusses.
- Weather Barrier: It acts as a secondary weather barrier, protecting the interior of the building from moisture penetration.
- Nailing Surface: Sheathing provides a solid surface for attaching roofing materials.
- Insulation and Energy Efficiency: It can contribute to the insulation properties of the roof, enhancing energy efficiency.
🛠️ 4 Options for Roof Sheathing Thickness
The thickness of roof sheathing is determined by several factors, including the type of roofing material, the spacing of rafters or trusses, and local building codes. The most common materials used for roof sheathing are plywood and oriented strand board (OSB). Here are the typical thickness options:
3/8-inch Sheathing
- Best For: Low-slope roofs with close rafter or truss spacing.
- Advantages:
- Lightweight and easy to handle.
- Cost-effective for budget-conscious projects.
- Disadvantages:
- Less strength and durability compared to thicker options.
- Not suitable for areas with heavy snow loads or high wind zones.
1/2-inch Sheathing
- Best For: Standard residential roofing applications.
- Advantages:
- Provides adequate support for most roofing materials.
- Balances cost and performance.
- Disadvantages:
- May not be sufficient for areas with severe weather conditions without additional support.
5/8-inch Sheathing
- Best For: Roofs in regions with heavy snow loads or high winds.
- Advantages:
- Enhanced strength and stability.
- Better resistance to warping and sagging.
- Disadvantages:
- Heavier and more challenging to install.
- Higher material cost.
3/4-inch Sheathing
- Best For: Commercial buildings or roofs with widely spaced rafters.
- Advantages:
- Superior strength and load-bearing capacity.
- Ideal for large-span roofing applications.
- Disadvantages:
- Significantly heavier and more expensive.
- May require specialized tools for installation.
✅ Standards and Building Codes
Building codes and standards are essential for ensuring the safety and durability of roofing structures. They provide guidelines on the appropriate thickness of roof sheathing based on various factors, such as load requirements, climate conditions, and construction practices. Here are some key standards to consider:
- International Residential Code (IRC): The IRC provides minimum requirements for residential construction, including roof sheathing. It specifies the minimum thickness based on rafter spacing and the type of roofing material. For example, the IRC typically requires a minimum of 3/8-inch plywood or OSB for roofs with rafters spaced 16 inches on center.
- Local Building Codes: Local building codes may have additional requirements or modifications to the IRC based on regional considerations. It’s crucial to consult your local building authority to ensure compliance with all applicable codes and regulations.
- Manufacturer Guidelines: Roofing material manufacturers often provide specific recommendations for sheathing thickness to optimize the performance of their products. Always follow the manufacturer’s guidelines to maintain warranty coverage and ensure the longevity of your roof.
💡 10 Installation Tips for Roof Sheathing
Proper installation of roof sheathing is essential for achieving the desired performance, durability and improves energy efficiency. Here are some practical tips to guide you through the process:
1. Choose the Right Material
Select the appropriate sheathing material and thickness based on your specific project requirements. Consider factors such as roof slope, rafter spacing, and environmental conditions.
2. Ensure Proper Ventilation
Adequate ventilation is crucial to prevent moisture buildup and prolong the life of your roof. Ensure that soffit vents, ridge vents, and other ventilation components are correctly installed and unobstructed.
3. Check for Flatness and Alignment
Before installing the sheathing, inspect the rafters or trusses for flatness and alignment. Correct any issues to create a smooth and even surface for the sheathing.
4. Use Appropriate Fasteners
Use nails or screws specified for roof sheathing to secure the panels. Fasteners should penetrate at least 1 inch into the rafters or trusses for a secure hold. Space fasteners according to the manufacturer’s recommendations and local building codes.
5. Stagger the Seams
Stagger the seams of the sheathing panels to enhance structural integrity. This technique, known as “brick bonding,” distributes loads more evenly and reduces the risk of weak points.
6. Leave Expansion Gaps
Wood-based sheathing materials expand and contract with changes in temperature and humidity. Leave a 1/8-inch gap between panels to accommodate this movement and prevent buckling.
7. Install Sheathing Clips
Sheathing clips, also known as H-clips, are small metal devices placed between the edges of adjacent sheathing panels. They provide additional support and help maintain proper spacing.
8. Inspect for Damage
Before covering the sheathing with roofing materials, inspect it for any signs of damage, such as warping, delamination, or water stains. Replace any damaged panels to ensure a solid foundation for your roof.
9. Consider a Weather Barrier
Applying a weather-resistant barrier, such as roofing felt or synthetic underlayment, over the sheathing provides an extra layer of protection against moisture infiltration. Follow the manufacturer’s instructions for installation.
10. Follow Safety Protocols
Roof sheathing installation can be hazardous, so it’s essential to follow safety protocols. Use fall protection equipment, secure ladders properly, and work with a partner whenever possible.
🙌 Ensuring a Durable, Beautiful Roof with Monarch Roofing
Choosing the right thickness for your roof sheathing is a crucial decision that impacts the performance and longevity of your roofing system. Understanding the options, adhering to standards and building codes, and following best installation practices ensure a sturdy, weather-resistant roof that stands the test of time. Whether you’re a seasoned professional or a DIY enthusiast, this guide offers essential knowledge and practical tips to navigate the complexities of roof sheathing thickness. The key to a successful roofing project lies in meticulous planning, quality materials, and precise execution, enabling you to achieve a roof that protects your home and enhances its value and curb appeal.
At Monarch Roofing, our experienced professionals combine deep industry knowledge with a commitment to quality, ensuring your roofing needs are met with precision and care. Trust us to provide expert guidance and top-notch service for a roof that excels in both performance and aesthetics. Ready to get started? Contact Monarch Roofing today to schedule a consultation and take the first step towards a durable, beautiful roof!


